by kchowanec | Apr 21, 2014 | Cards, Stamping
Background stamps are an easy way to add to your card and the Hardwood Background stamp is no exception! I have been finding it hard not to want to use this stamp on all of my cards recently. Today’s card is one of the cards designed for my monthly card class. See my tips and tricks for creating this card below. I will attach a complete supply list below.

Card Dimensions:
Whisper White card stock: 8 1/2″ by 5 1/2″
scraps of whisper white for saying & butterflies
Tips for creating this card:
- There was no need for layers on this card when I stamped the Hardwood Background stamp in Soft Suede Classic Ink. Background stamps are great for adding depth and dimension to your cards!
- I wanted the card to have a feminine feel so I grabbed my Tea Lace Paper Doilies for that little touch! I just added half of a doily to this card.
- Butterflies stamped in Melon Mambo and Pool Party really brighten up the card. Don’t be afraid to add color! I used the Papillon Potpourri stamp set and coordinating punches to make these butterflies a breeze to create!
- Add dimension. When you have a ‘one layer’ card it’s important to add dimension in other ways. I achieved that here by using dimensionals to pop up the butterflies and the greeting which was stamped using the hostess exclusive stamp set Express Yourself.
- Finally I finished off my card with a little flower button in Melon Mambo and a little piece of bakers twine tied in a bow.
Be Creative, Kristin
tams# 619
Product List
by kchowanec | Apr 16, 2014 | Announcements, Scrapbooking, Stamping
I am SO excited to share with you the BIG news! Stampin’ Up! is teaming with Becky Higgins to bring Project Life Products in Stampin’ Up! colors and designs to you!! Project Life is a super simple, totally affordable way to get your photos into albums: you just slip your photos into Photo Pocket Pages and add designed cards. It’s a back-to-basics approach to documenting your life. In a nutshell, it’s all about spending more time making memories and less time scrapbooking them!
You’ll be able to order a selection of Project Life products starting May 1! And with the launch of our new annual catalog on June 2, you’ll be able to buy from our complete line of Project Life products.
I am looking forward to scheduling classes and home workshops using this new product. I’d love to host one for you and your friends and show you first hand how easy these products really are to use! Send me an email at kristin(at)inkedcreations.com to reserve your date!
This video will give you a little preview of the awesome products you can expect from Project Life and Stampin’ Up!
by kchowanec | Apr 14, 2014 | Cards, Stamping
Sympathy cards are not something that I sit down to make unless I have a reason, which makes them somewhat difficult to make for me. I unfortunately needed one recently and I thought I’d share my final result.

Card Dimensions:
Sahara Sand card base: 4 1/4″ by 11 1/2″
Sahara Sand 3 3/4″ by 5″
Tips for creating this card:
- Sympathy cards lend themselves to being soft and muted. Use neutral colors or colors from the Subtles color family when creating sympathy cards to achieve this result. I used Sahara Sand for both the base of my card as well as the layering piece.
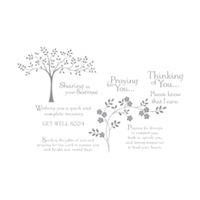
- The Thoughts and Prayers stamp set was created to work perfectly for Sympathy cards. I used the sayings in combination with the flowers from the Happy Watercolor stamp set.
- Add some embossing for elegance. I used Whisper White Embossing Powder on the flower image as well as the saying for this card. It really makes it pop when you emboss on a piece of colored card stock.
- Add soft colors. I went right to my Subtles color family to color in the flowers. The Stampin’ Write Marker colors used are Wisteria Wonder and Pear Pizzaz.
- Add simple embellishments. The simple bow on the front of the card using some Wisteria Wonder Ruffle Ribbon adds just enough embellishment for a sympathy card.
I have a step by step tutorial on making this card to download and print HERE. You can find other card ideas and tutorials by searching my gallery.
Be Creative, Kristin
Print Recipe
Product List
by kchowanec | Apr 7, 2014 | Cards, Stamping
I don’t know about you, but I sometimes struggle coming up with a good “guy” card, so when I recently had the opportunity to join a masculine card swap I was all in for the ideas! I thought I’d share with you one of those ideas in today’s post.
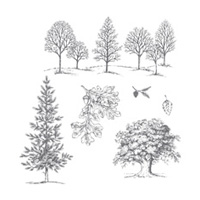
 This first card was designed by my friend Lori. She used one of my all time favorite stamp sets, Lovely As A Tree. I’m really hoping this stamp set NEVER retires. In fact, whenever the retirement lists come out I cringe until I see that Lovely As A Tree is not on there! I heard last year that this stamp set earns the award for being in the catalog the longest.
I love what Lori did here with the Woodgrain Background stamp as well! Perfect for coordinating with this stamp set. She also used the paper piercer and coordinating templates to add some dimension to the focal tree image.
Here are the supplies for this card:
Product List
Be Creative, Kristin
by kchowanec | Mar 28, 2014 | Cards, Stamping
Hello & Happy Friday friends!! I don’t know about you, but I feel like I have been so short on stamping time lately. The boys are getting busier with activities outside of school and I always feel like I have a million things to do at home. Since time has been limited I’ve had to come up with some quick and easy cards to create. Today’s card fits into that category!
 The nice thing about this card is that you can easily change out the Designer Series Paper and greeting for a completely different look!
Card Dimensions:
Crisp Cantaloupe: 5 1/2″ by 8 1/2″
Whisper White: 4 1/2″ by 3 1/4″
Designer Series Paper: 3 pieces of DSP 2 1/4″ by 1 1/4″
Tips for creating this card:
- Use up those scraps of Designer Series Paper (DSP)! This card lends itself to using all those little scraps you have laying around…and if you’re like me you have every last scrap just in case! I pulled out my favorite DSP right now, the Watercolor Wonder paper, and cut a few scraps the size I needed. The DSP is so colorful it really adds so much to this card without a lot of work!
- Add some sponging. Whenever I’m looking for a little something extra I turn to one of the first “techniques” I learned as a stamper…sponging! It adds a little extra pop to this otherwise simple card. I sponged the whisper white cardstock using the Island Indigo Classic Ink.
- A little ribbon or twine can go a long way! To finish off the card I tied a little Island Indigo Bakers Twine onto the front of the card.
- Pretty words can really make a difference on your card. I knew the card was going to be simple so I grabbed a greeting from the A Dozen Thoughts stamp set that I knew would jazz it up a bit. This is the perfect stamp set for a quick greeting!
So grab your scraps of DSP and give this card layout a try! I know you will love it and it will soon become your “go to” layout for quick and easy cards! If you want to see all the products I used on this card or to purchase any products please see my links below.
Be Creative, Kristin
tams# 497
Product List
Stamp
Ink
Card Stock
Tools & Adhesive
Ribbon & Trim
by kchowanec | Mar 25, 2014 | Cards, Stamping
Sale-a-bration is about to come to a close once again, March 31 to be exact. Besides the new catalog release, Sale-a-bration is my favorite time of year! Who doesn’t love getting rewarded for placing an order?! I thought I’d share with you a card using my absolute favorite product from the Sale-a-bration catalog this year.

I don’t know what I did before the Banner Blast stamp set and coordinating punch came along! My friend and fellow demo Lyssa provided this card for us to make at our February monthly meeting. This card looks like it might take some time to put together, but the new Banner Punch makes it a breeze!!
Don’t miss out on getting some of your favorite new products for free! You can pick a free product out of the Sale-a-bration catalog for every $50 you spend. So if you spend $100 you get can choose two free items, and so on! You can view the Sale-a-bration brochure HERE.
Be Creative, Kristin
Product List
Stamp
Ink
Card Stock
Punch


![Hardwood [clear] 133035s](http://www.stampinup.com/images/EC/133035s.jpg)



![Happy Watercolor [clear] 133191s](http://www.stampinup.com/images/EC/133191s.jpg)
