by kchowanec | Aug 19, 2014 | Cards, Stamping, Tutorials
Did you know that Post-It notes can be a great tool for stamping?! I know they are great for taking little notes and marking pages, but I have a stack of them sitting on my stamping table at all times! Today’s technique demonstrates how to use these handy Post-It’s to create a layered image that adds depth to your cards and projects.
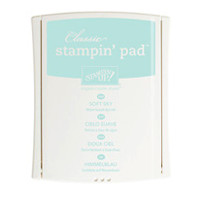
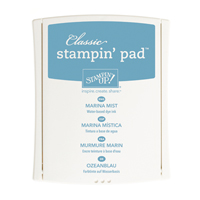
 The first step is to find a stamp set that will work with this look. I decided to use my new favorite set, Flower Patch. Choose several colors that will go well together. I grabbed 5 different colors from the subtle family to use on my card. I will post my supplies list below.
Always start by stamping the image that you want to appear in the foreground of the card (on the top of the other images). In this case I used the largest flower image from this stamp set.
 After stamping your first image, ink it up and stamp it again on a Post-It note. Make sure to get part of the image on the sticky part of the Post-It. Then cut this image out as close to the edge as you can get. This becomes your mask. I created a second mask for the pink flower on this card as well.
 Using your mask to cover up your main image, stamp the images that will appear behind it. You can remove your mask and continue using it several times. Once you are satisfied, remove and admire your work!
 It really is that easy!! With a few basic supplies you can be making beautiful layered cards like this! I hope you take a second look at those Post-It notes sitting on your desk and give this technique a try today!
Be Creative, Kristin
Product List
by kchowanec | Oct 15, 2013 | Stamping, Tutorials
Hello! I have a fun project and tutorial for you today! I created this box based off of several others that I have seen.
 This little treat box is made using the Envelope Punch Board. I am in LOVE with my envelope punch board. Never has making envelopes been SO easy! Of course there are lots of creative ideas for using it to make things besides envelopes. For supplies used please see my links below under Stamping Supplies.
Just a few notes about the leaves on my project. I used the emboss resist technique to create them. I stamped my leaf image with versamark and embossed using gold embossing powder. Then I used sponges and three different colored inks to sponge the leaves before cutting them out. It gives them such a pretty look!
You can find the tutorial and printable PDF for this box by clicking here. I hope you give it a try! Please let me know if you have any questions, I’m happy to help.
Be Creative, Kristin
Stamping Supplies:
tams# 143
by kchowanec | Oct 2, 2013 | Cards, Stamping, Tutorials
Have you seen the File Folder Cards that are made using the new Envelope Punch Board? I just love them and they are SO easy to make! I had a few questions about how to make the tab along the side of the card so I snapped a few pictures and make a quick picture tutorial for you.

A couple of notes:
- You want to start with a 4 1/4 by 5 1/2 inch card base
- After you have finished the back tab portion you need to trim 1/2 inch off the front flap of the card the long way so that the tab sticks out
- Your card will fit into a medium sized (regular) Stampin’ Up! envelope
Just click on the image above if you want to see it closer and in more detail. At only $19.95 the Envelope Punch Board is such a deal and there are instructions on the board to make over 66 different sized envelopes in addition to all of the other great ideas!
Be Creative, Kristin
by kchowanec | Apr 11, 2013 | Cards, Stamping, Tutorials
What a fun card! I have to admit that I purchased the Pinwheel Sizzlits Die back in January and couldn’t figure out what to do with it. I had seen several ideas online, but the other night at our local demonstrator meeting I saw a card using the Pinwheel Die as a spinner! I just knew that I had to get home to make a spinner card using the Pinwheel!

For those of you who are not familiar with the Pinwheel Sizzlits Die, it is this fabulous little die that cuts out a Pinwheel for you! All you have to do is add a brad of your choice to the ends and fold it into the center. Easy peazy as my kids would say!

Would you like to make one of these fun spinning cards? If you would like to see this tutorial with pictures use the tams#102 link below. Click HERE for a free printable PDF (without step by step pictures) of this project!
I’d love to hear what you think about creating more tutorials and printable PDF’s for you! Leave me a comment and let me know if these are useful and what types of tutorials you want to see.
Be Creative, Kristin
Stamping Supplies:
tams# 102
by kchowanec | Feb 11, 2013 | Projects, Stamping, Tutorials

Since I have two kiddos in school now I am always looking for cute ways to give little treats, especially for Valentines. I try to be a little health conscience when it comes to treats and I really don’t like to always give out candy or chocolate. I decided this year to give out little fruit snacks to each of the kids and of course I had to come up with a cute packaging idea!
I thought I would share with you my very simple tutorial on how to make these little treat packages so you can whip up a few just in case you haven’t figured out what you are doing yet! 🙂
The first thing you need to do is start with a piece of Designer Series Paper of your choice that measures 9 1/2 by 3 1/2 inches. Then you need to score and fold the paper at the 3/4″ mark and 5″ mark (lengthwise).
 Once you have your paper scored you can take it to your Big Shot and cut out the window for the front of the treat holder. I used a die from the Apothecary Accents Framelits dies. You could use a heart or any other shape of your choice. Just make sure that you are cutting the front of the treat holder.
 You can see from this picture what your treat holder should look like once you have your little window cut out. After that you can add your fruit snack or little candy into the holder. To keep it in place I used a small hole punch and punched right through both layers of the treat holder and the fruit snack.
 The last step is to thread Bakers Twine through both the holes and tie a knot or bow in the front of the treat holder. I also added a cute little tag to the front of the treat for each child.
So that’s it…a simple yet cute treat holder! If you had older kids they could even help you make them! Much better than those little cards with candy attached, don’t you think?!
Be creative, Kristin
by kchowanec | Sep 20, 2012 | Projects, Stamping, Tutorials
Hello Stampers! I have a fabulous tutorial for you today! Just look at this cute little Halloween Box! I was asked to demonstrate a Halloween Project at the monthly Song Of My Heart Stampers meeting and I came up with this adorable little box to demonstrate. I was so nervous to get up in front of the 20+ people, but I managed to survive! I hope they enjoyed the project and I promised to add the tutorial to my blog so they could come back and see the step-by-step instructions. So here you go.
 1. The first step is to cut out the front & back of the box shape in Basic Black card stock using the largest of the Labels Collection Framelits and your Big Shot.
2. Emboss the Framelit shape that you just cut using the Spider Web Embossing Folder and your Big Shot.
 3. Using your Paper Trimmer, cut the Framelit shape in half, creating the front and back of your box.
4. Cut two pieces of Basic Black card stock, measuring 5 1/2″ by 2 3/4″.
 5. Score both pieces using your Simply Scored Tool at 1″, only on three sides. You can see from the picture here that I left the top unscored.
 6. Cut out two squares on one piece and cut up the score line on the other piece. Your two pieces should look like the picture. Fold on the score lines.
 7. Add adhesive and assemble your box. I used sticky strip for mine. You can use SNAIL, but it might not be as sturdy. Make sure to tuck in your sides when you create the box so you don’t have little pieces sticking out.
 8. Attach your front and back to the box. I used Sticky Strip again for this step just to make sure it had a good hold.
9. At this point you can spray your box with Shimmer Mist if you want. You can then embellish your box as you like. I added a rosette to the front along with a little embellishment using the Mixed Medley Hostess Stamp Set that is in the current Holiday Mini Catalog.
 10. To create the rosette you will take a piece of DSP that measures 1″ by 12″ and score it, using your Simply Scored, every 1/2″. Accordion fold your DSP and it should resemble the picture.
 11. To keep the rosette together I added two circles, punched using the 3/4″ circle punch, to the front and back centers of the rosette. I used Glue Dots to stick these on.
 12. Add your rosette and embellishments to your box and you are done!
I also used a clear cello bag to add a few cookies to the box. You could easily fill this with other goodies as well! I’m thinking these little boxes would be great for teacher gifts, special Halloween gifts for your kids, or neighbors.
Thanks for stopping by & I hope you enjoyed my tutorial today!
Be creative, Kristin
 The first step is to find a stamp set that will work with this look. I decided to use my new favorite set, Flower Patch. Choose several colors that will go well together. I grabbed 5 different colors from the subtle family to use on my card. I will post my supplies list below.
  After stamping your first image, ink it up and stamp it again on a Post-It note. Make sure to get part of the image on the sticky part of the Post-It. Then cut this image out as close to the edge as you can get. This becomes your mask. I created a second mask for the pink flower on this card as well.
  Using your mask to cover up your main image, stamp the images that will appear behind it. You can remove your mask and continue using it several times. Once you are satisfied, remove and admire your work!
  It really is that easy!! With a few basic supplies you can be making beautiful layered cards like this! I hope you take a second look at those Post-It notes sitting on your desk and give this technique a try today!


 Once you have your paper scored you can take it to your Big Shot and cut out the window for the front of the treat holder. I used a die from the Apothecary Accents Framelits dies. You could use a heart or any other shape of your choice. Just make sure that you are cutting the front of the treat holder.


